
Sunday, October 30, 2011
Tuesday, September 13, 2011
Tutorial - How to Make a Multi Strand Bracelet
Hello there! My name is Peg. I’m a meek and mild accountant by day and a crazed jewelry maker the rest of my waking hours. My Etsy shop is called Abacus Bead Creations.
I’m going to give you a quick tutorial on how to make a multi strand bracelet.
This will be a three strand bracelet. It is best to pick beads of different size, texture, and color for each strand. My first strand has rich brown tiger iron and green rhyolite gemstones. I also mixed in some African turquoise chips.
 |
| Strand 1 - Tiger Iron Malachite Rhyolite and African Turquoise Beads |
The second strand includes some great Czech rondelles with swirls of green, brown, and nougat colors. I also used round amber glass beads and seed beads in dark green, rust and tan strung in a repeating pattern. Yes, that’s the accountant in me….gotta have things all in order!
 |
| Strand 2 - Czech Glass Beads with Seed Beads |
The third strand has round gemstones of different sized green malachite and also rhyolite. I used some of the same rust seed beads in between. I also added a few of the Czech rondelles that I used in the second strand.
 |
| Strand 3 - Malachite, Rhyolite and Czech Rondelles |
Once I have my three strands I bring them together and twist them around each other to see how they will blend. Sometimes I change things around after seeing how the bracelet flows. You want to have the small beads fill in the areas between the larger beads.
I use bead stoppers on the ends of each strand to hold everything in place until I’m ready to assemble the bracelet. You can find these in craft shops and they are available in most jewelry making supply shops on the internet.

Now it’s time to put everything together. This particular clasp has three loops, so I will attach each strand separately. Sometimes I put two strands together and use one crimp to attach them both. It depends on the size of the clasp and how many loops it has.

Using my crimper, I first make a half moon shape in the crimp bead using the back groove on the crimping tool, then I place the crimp bead in the front groove to roll the crimp into a bead. I attach all the strands to one clasp piece first. Then I attach the other half of the clasp one strand at a time, keeping the wire as tight as possible so there will be no wire showing.

Here is the finished design with a close up of the clasp to show it is attached. Once the bracelet is assembled I twist the strands around each other to show off all the different gemstones and glass beads.
I also use this method to make multi strand necklaces. You can see examples of my necklace creations here.
I also use this method to make multi strand necklaces. You can see examples of my necklace creations here.
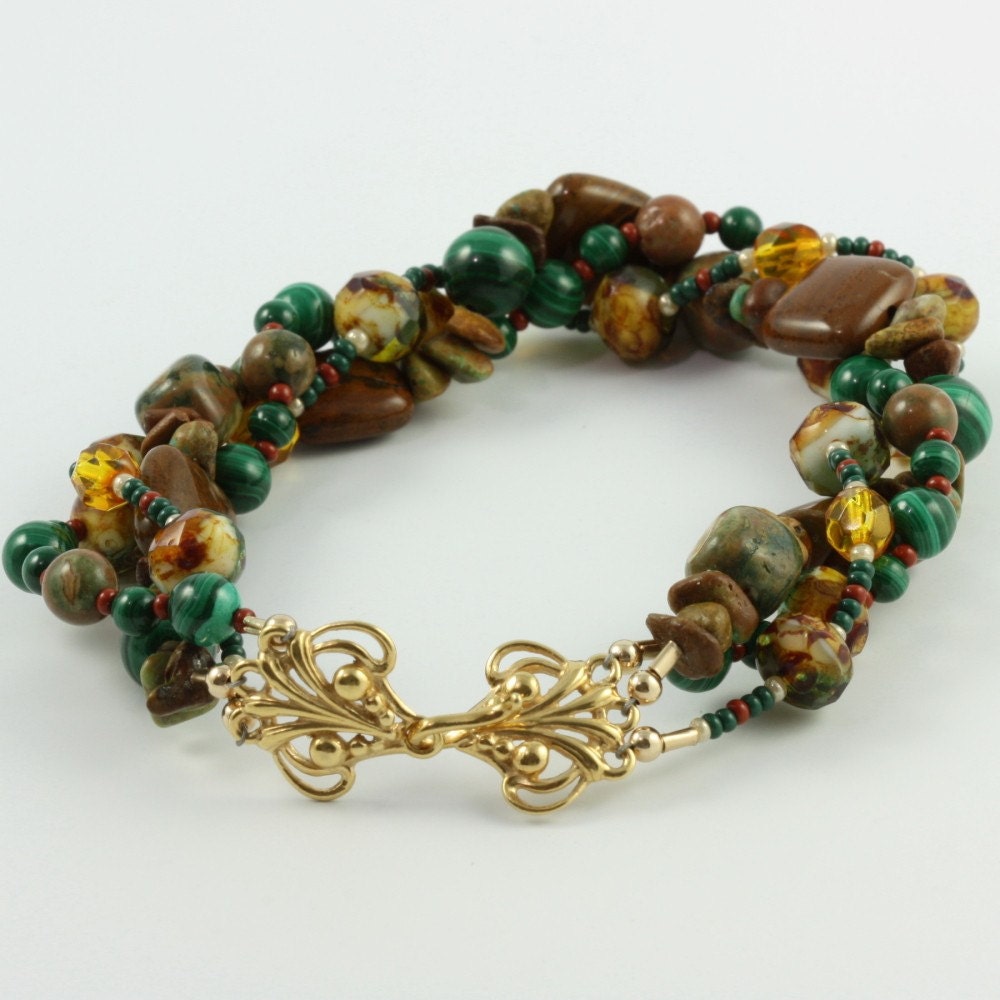 |
| Green Malachite and Tiger Iron Bracelet |
Jewelry making brings me hours of enjoyment (and a few moments of frustration too!). It is so rewarding when someone sees my work and loves it enough to buy it for their own. I hope this tutorial inspires you to try something new with your bead stash today! Thanks everyone!
Peg
Abacus Bead Creations
Peg
Abacus Bead Creations
Friday, January 15, 2010
Under Construction
This blog is in my head right now, but I hope to share my ideas with you soon! Please check back.
Subscribe to:
Posts (Atom)